
Week 15: Wildcard Week
Assignment
Design and produce an object using a digital fabrication process that incorporates computer-aided design (CAD) and manufacturing (CAM) techniques not previously covered in other assignments. Document the process and requirements clearly, including all necessary steps for reproduction. Potential projects could range widely within the scope of digital fabrication.
My Plans
- Design Origami using CAD software.
- Create a crease pattern with Zund cutting technology.
Origami
Origami is the traditional Japanese art of paper folding to create both two-dimensional and three-dimensional objects.
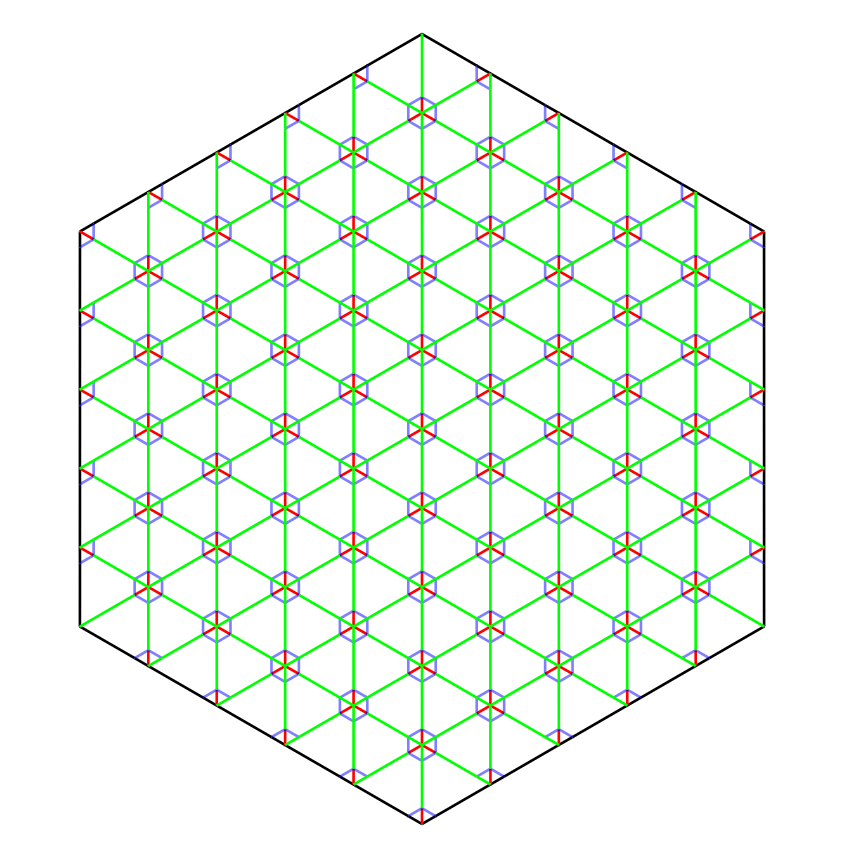
What is a Crease Pattern?
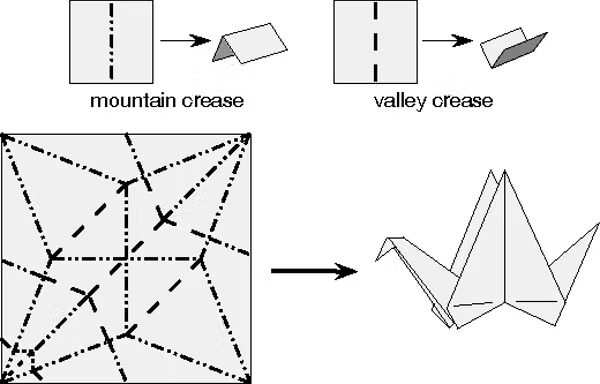
A crease pattern is an origami diagram that shows all or most of the folds required to create the final model, represented in a single image.
Valley and Mountain Folds
These are fundamental folds in origami:
- Valley Fold : A fold that forms a trench-like shape.
- Mountain Fold : A fold that forms a ridge-like shape.
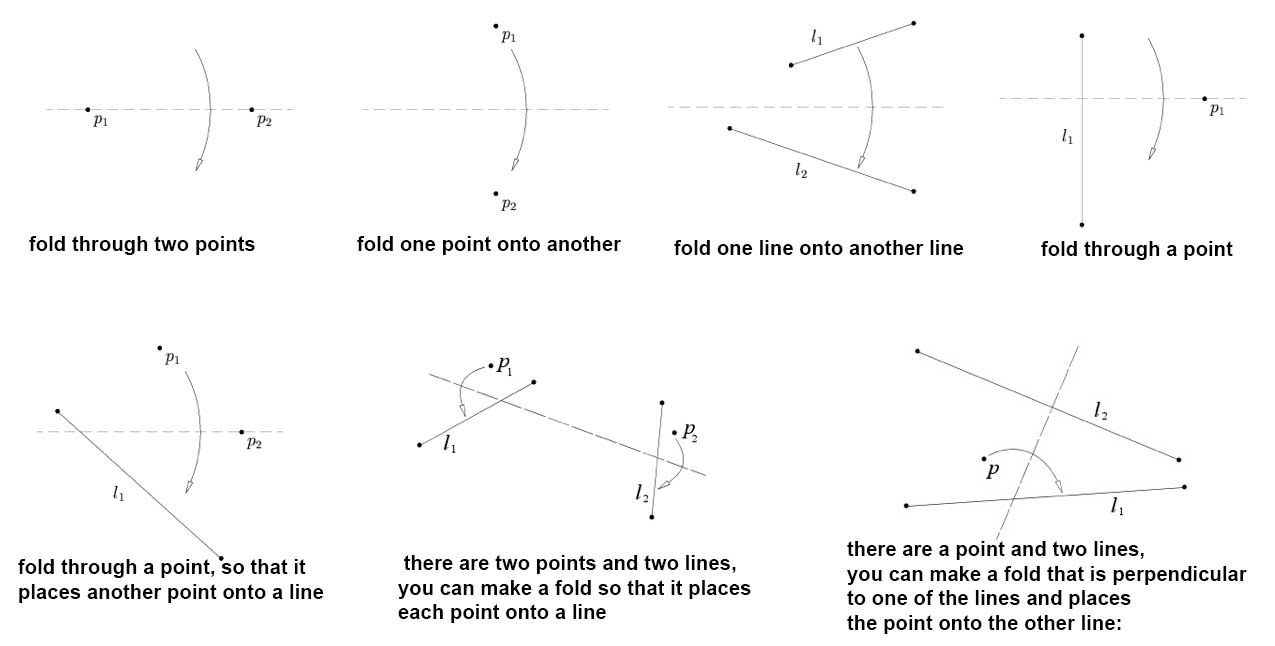
Mathematics Behind Origami Folding
Axioms of Origami
Origami involves various types of folds, some of which are illustrated below.
Create a New Origami
I aimed to learn how to design origami by researching online origami tools.
d-origami.com
d-origami.com is an online platform for creating simple origami designs. You can download the crease pattern of your design. I attempted to design a paper airplane, but the tool became unresponsive after a few folds.
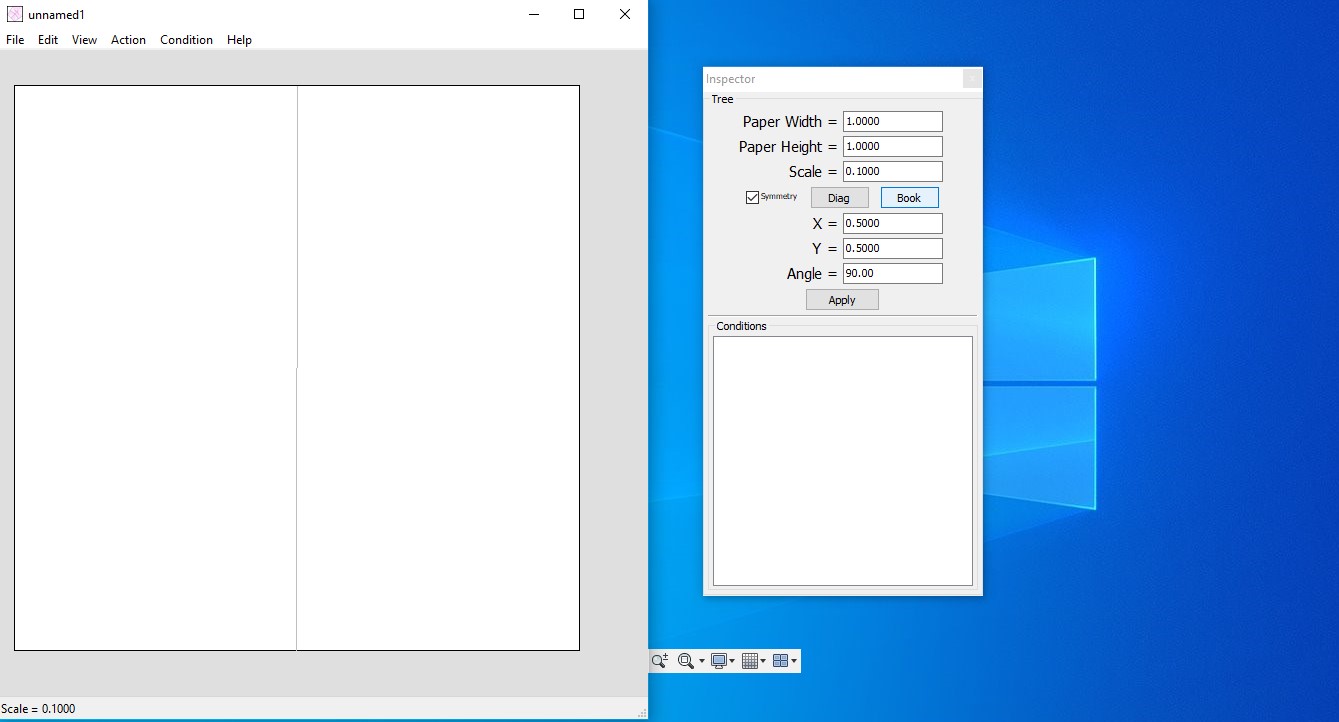
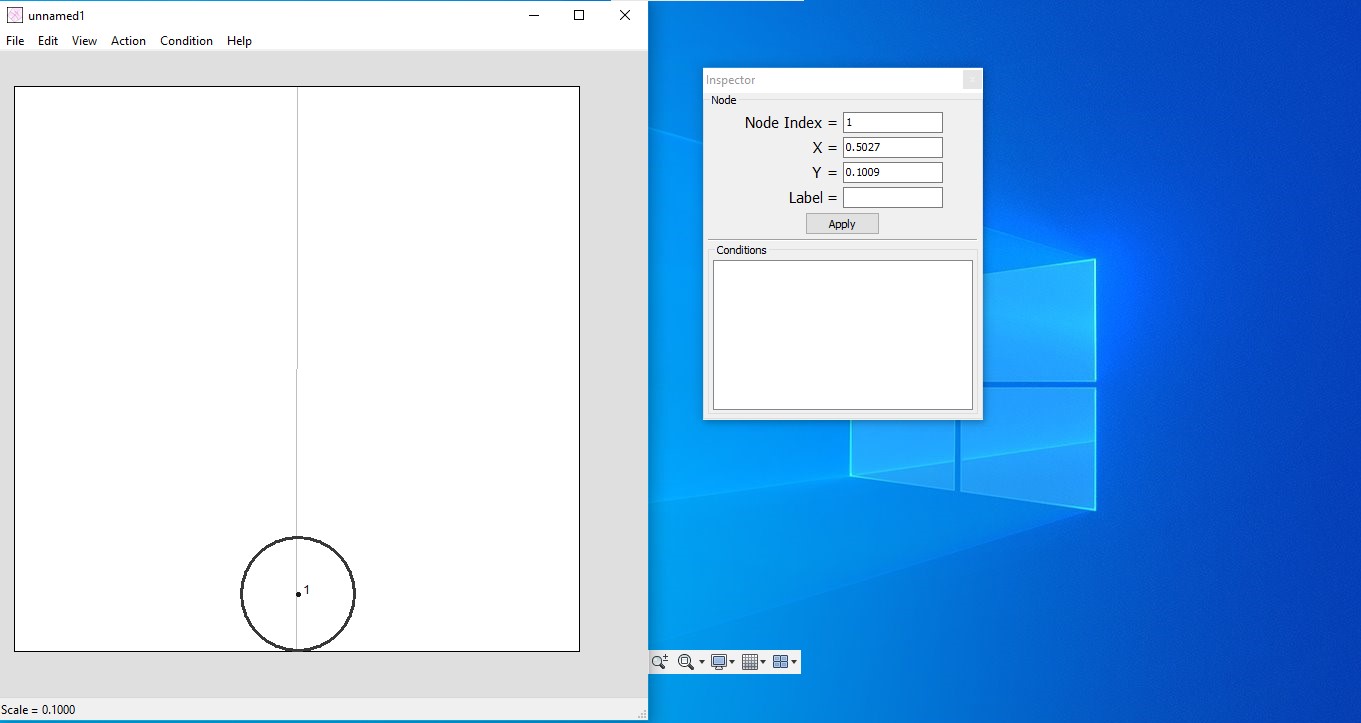
TreeMaker
TreeMaker is a program designed for creating origami bases. By drawing a stick figure of the base on the screen, each stick represents a flap on the base. Here are the steps I followed to create a dinosaur model and a tortoise using the same base:
-
Make a Stick Figure
: Draw a simplified representation of the base of the origami model. This includes flaps and rivers, showing their relationships and dimensions.
-
Nodes in TreeMaker
:
- Leaf Nodes : Edge nodes represented by circles.
- Branch Nodes : Nodes with two or more edges, represented by dots.
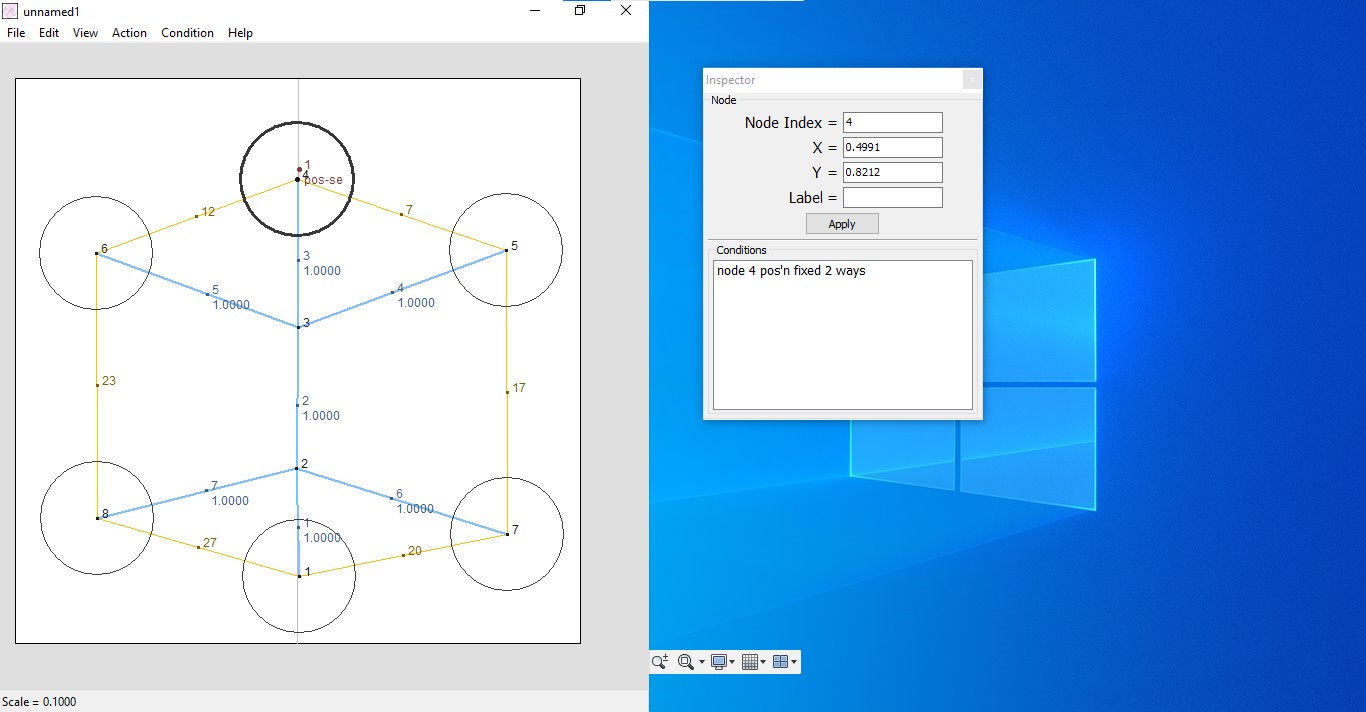
Designing Origami in TreeMaker
- Download and install TreeMaker.
-
Use the simple UI to draw the origami model, starting with a symmetry line.
-
Create nodes and edges by clicking points on the screen.
-
Define the properties of each node and edge, such as symmetry and fold type.
-
Generate the crease pattern and view the folded form.
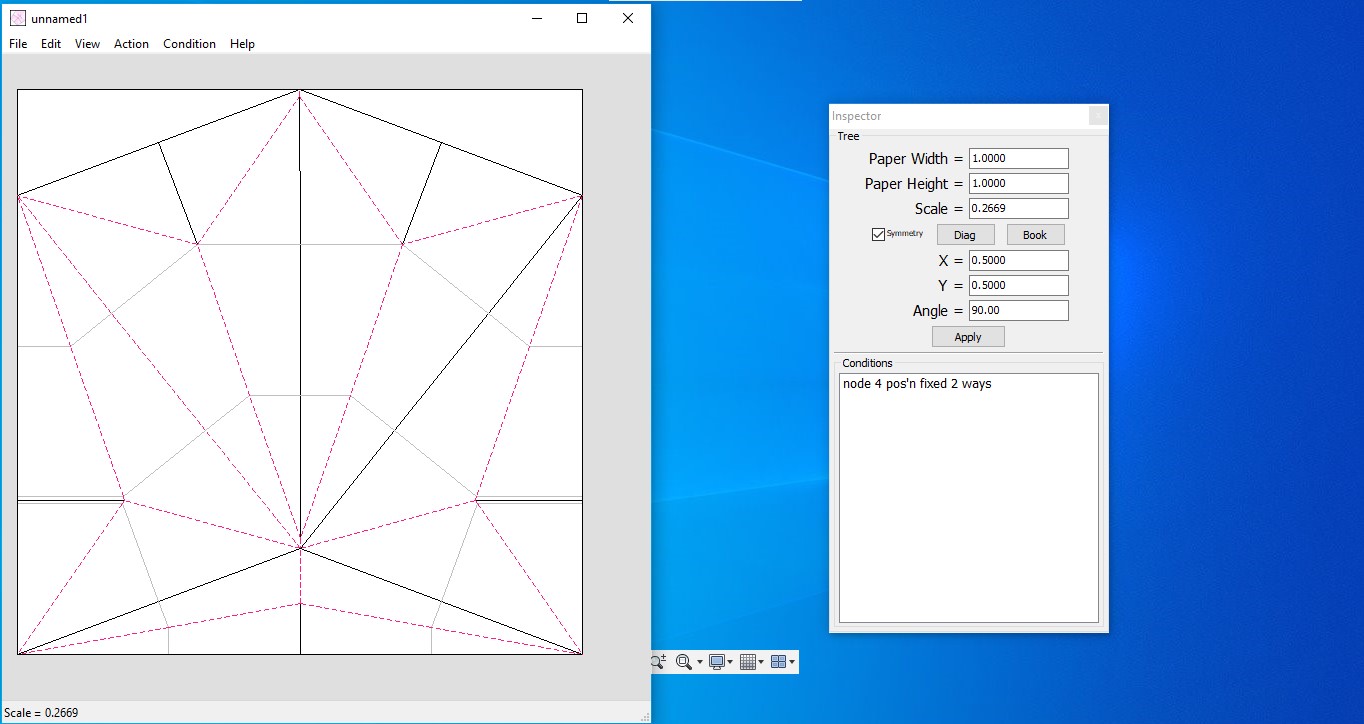
- Save and print the file.
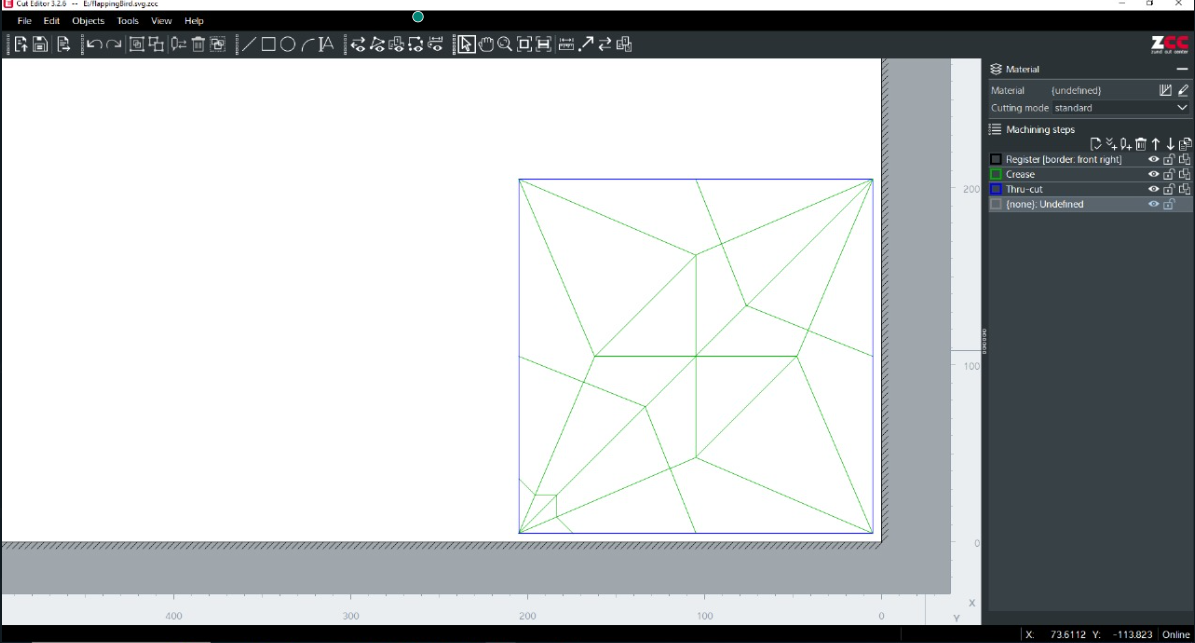
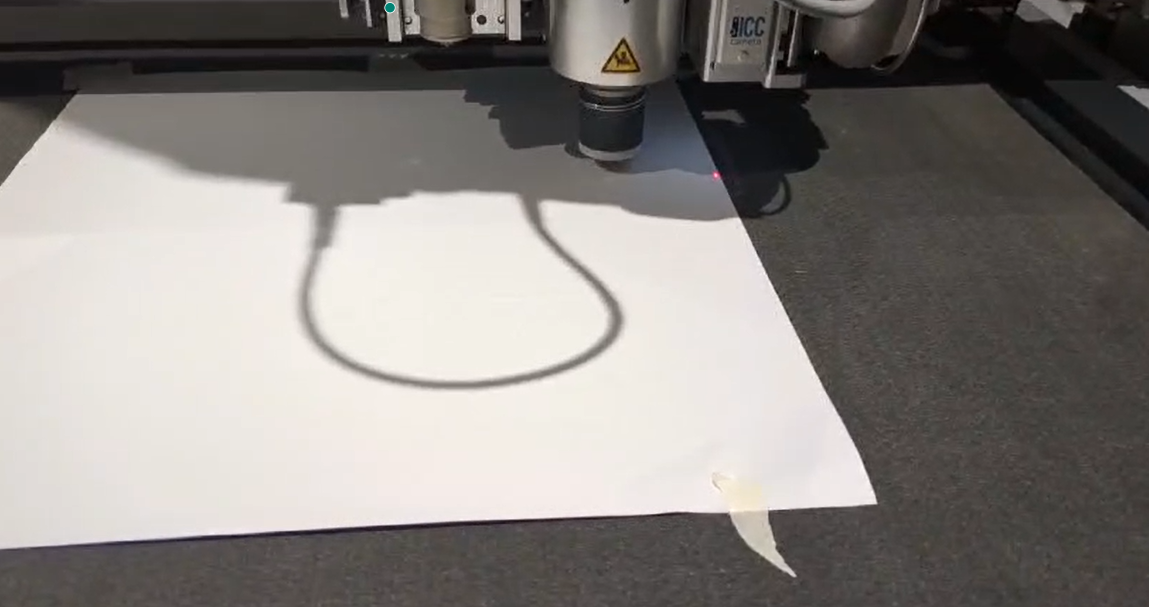
Creasing on Zund
I used the Zund cutter to crease the patterns. The machine has edge-detecting features and allows for different tool assignments for various fold types.
-
Defining Machine Steps
:
- Import the crease pattern.
- Assign tools for different types of folds and cuts.
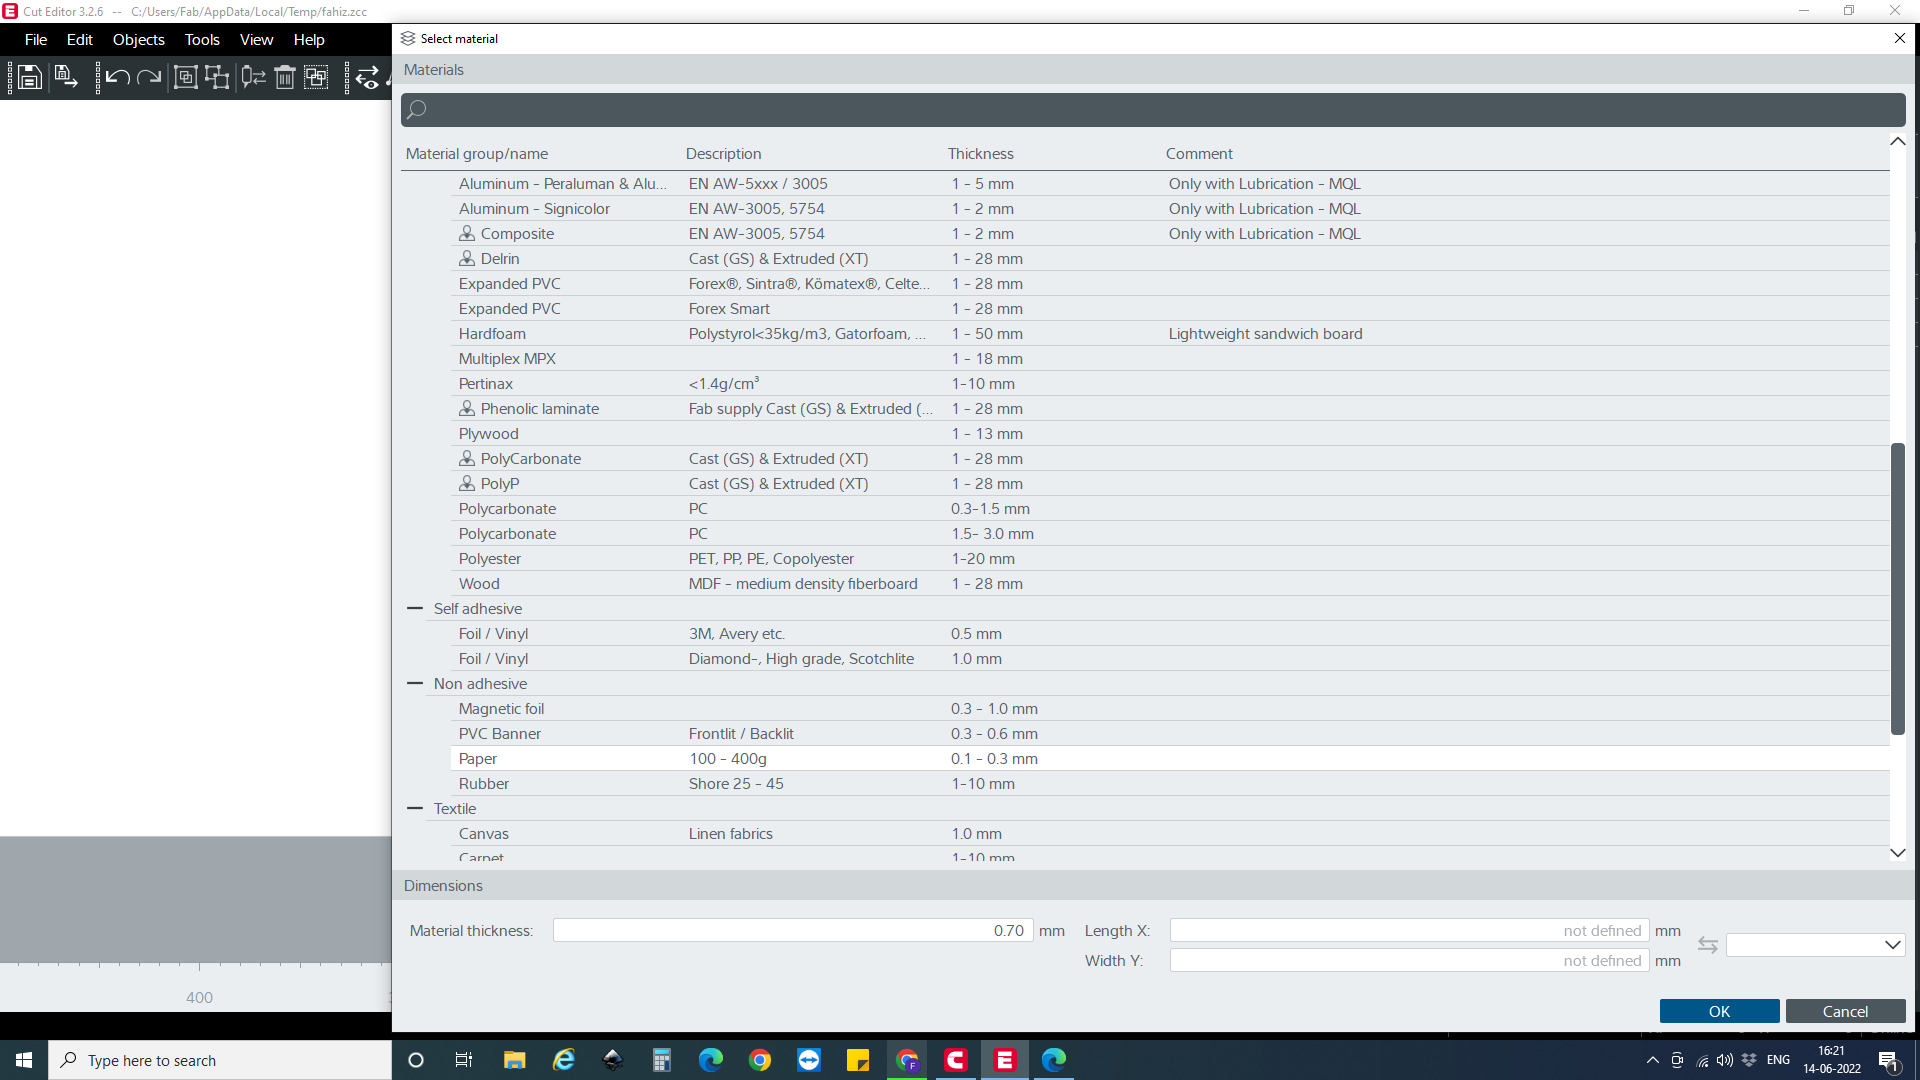
- Crease Settings : Adjust the method, tool, crease depth, and speed.
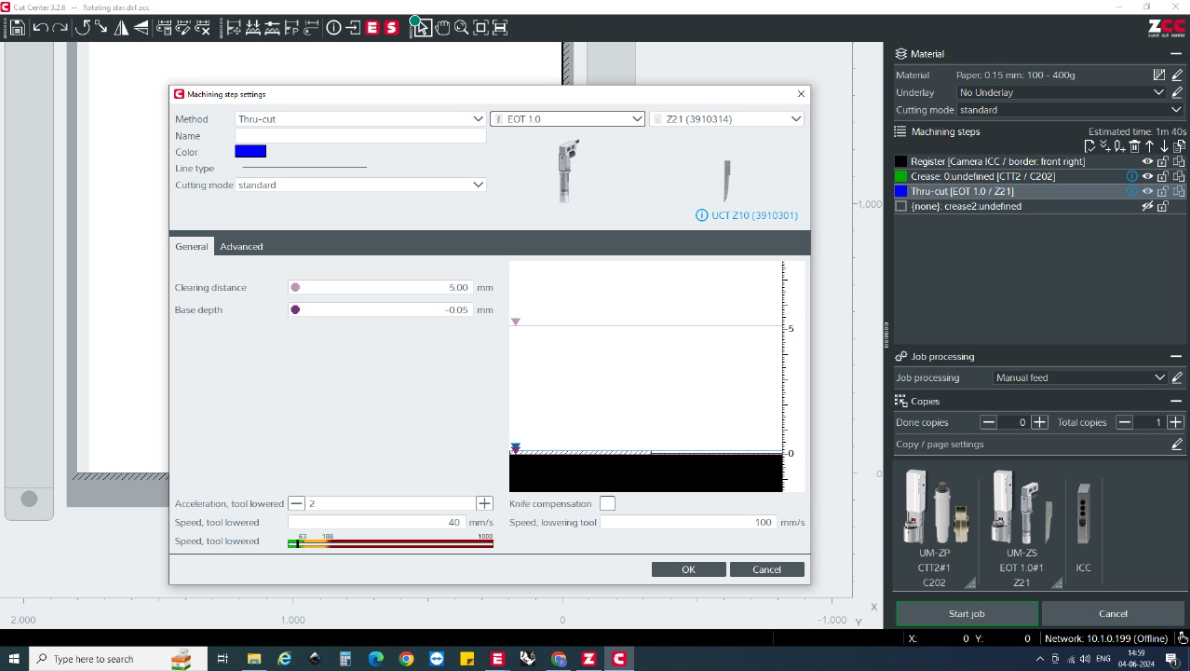
Executing the Job : Start the job and adjust settings as needed for optimal results. Selecting the edges for the cut.
For the origami sphere, the creases had to be made on eahc of the sides of the paper. Hence the creases were categorised according to the colours. One of the sides were first creased followed by the next side.
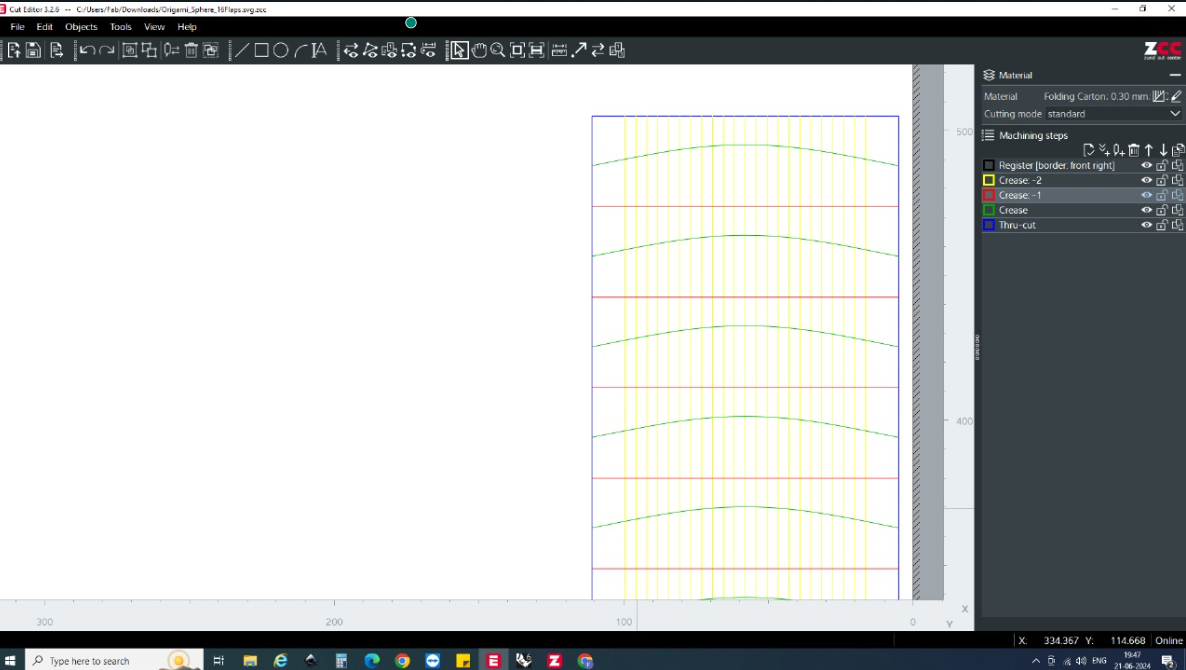
The following creases were done on the other side of the paper.
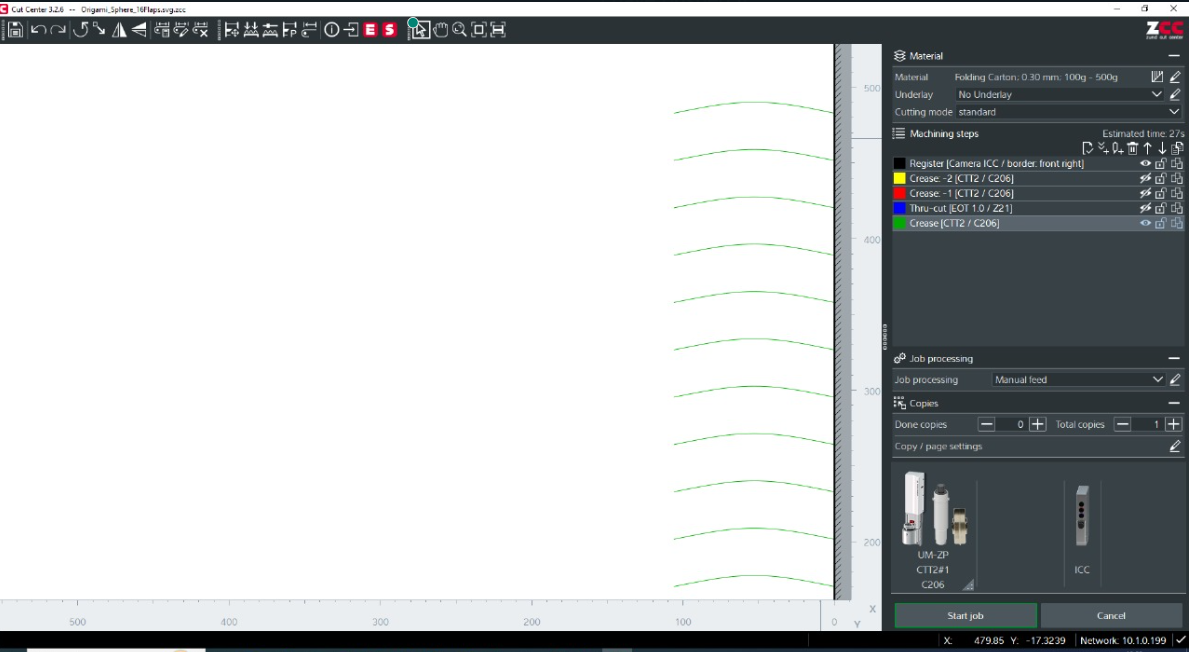
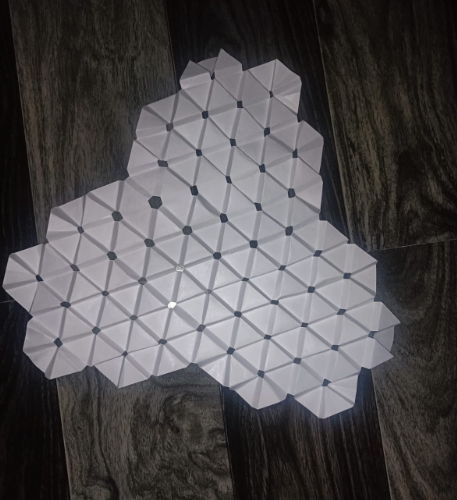
Folding Creases
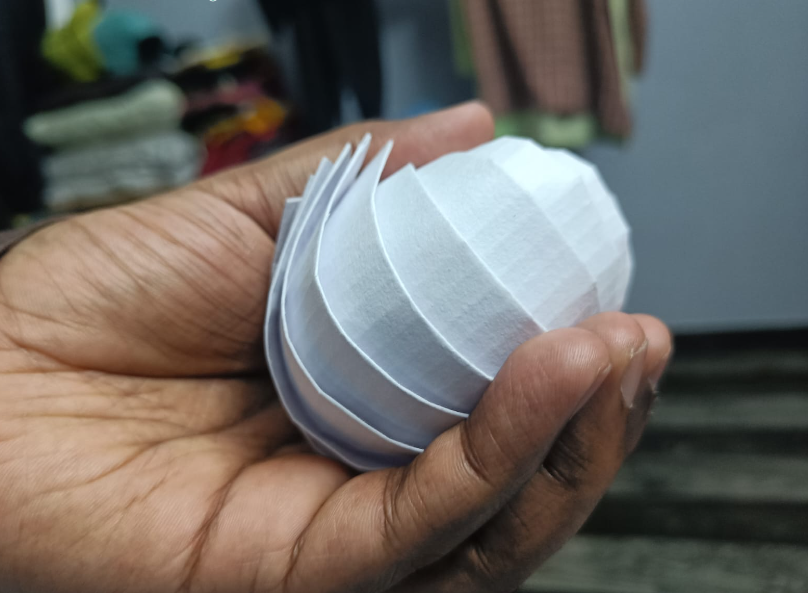
Origami Sphere
The origami sphere was folded and obtained as follows:
The folded origami sphere looked like this.
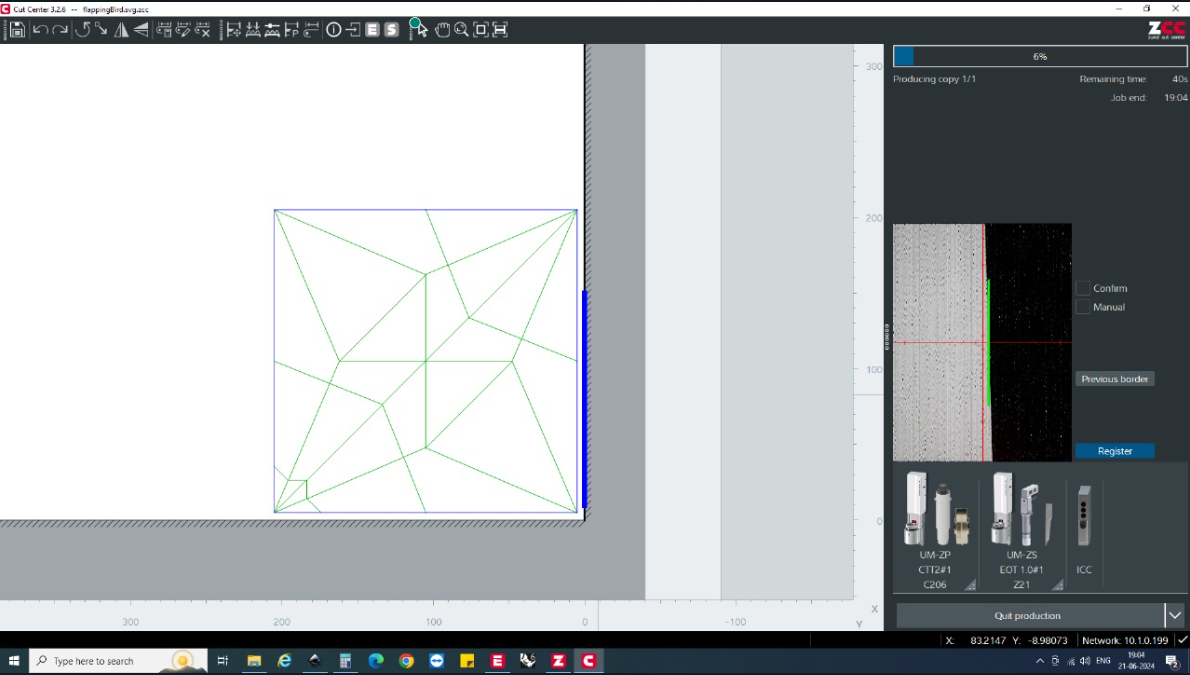
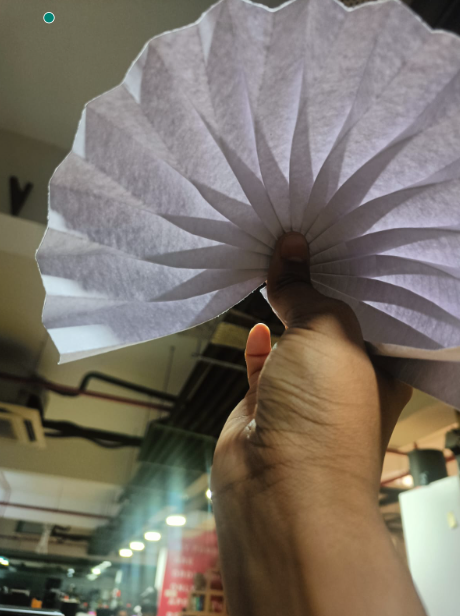
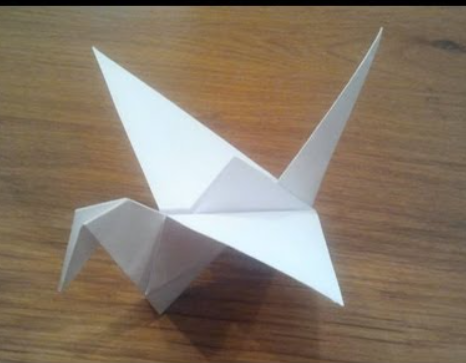
Flapping Bird:
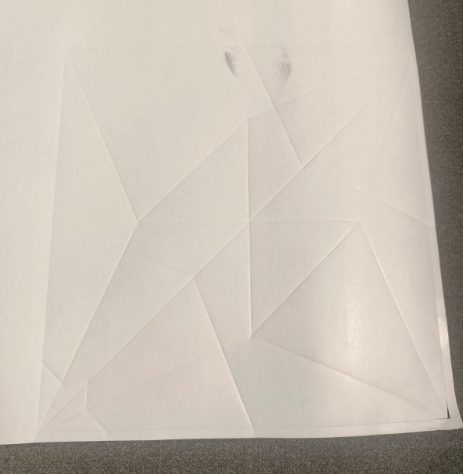
Creased paper looked as follows:
Folded flapping bird looked as follows:
Kirigami: The Art of Paper Cutting
Kirigami, a variation of origami, is the art of paper cutting to create intricate designs and structures. Unlike origami, which primarily involves folding, kirigami combines both cutting and folding to achieve its results. This art form allows for a wider range of creative expressions, producing both decorative and functional objects.
Origins and Techniques
Kirigami originated in Japan, similar to origami, and has been practiced for centuries. The term "kirigami" comes from the Japanese words "kiri" (to cut) and "kami" (paper). The basic techniques involve making precise cuts in paper and then folding or unfolding along those cuts to create patterns or three-dimensional forms.
Basic Kirigami Techniques
- Basic Cuts : Simple cuts that can be made to create symmetrical designs, such as snowflakes or flowers.
- Pop-Up : Techniques that involve cutting and folding paper to create pop-up structures, often used in greeting cards and books.
- Modular Designs : Combining multiple cut and folded pieces to create larger, more complex structures.
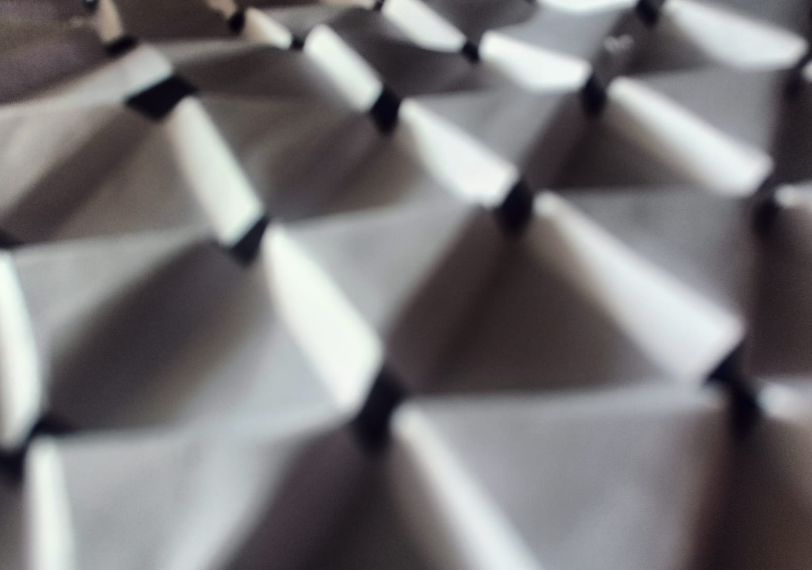
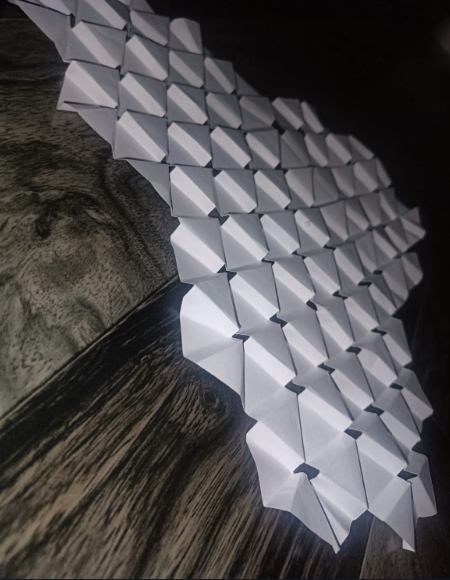
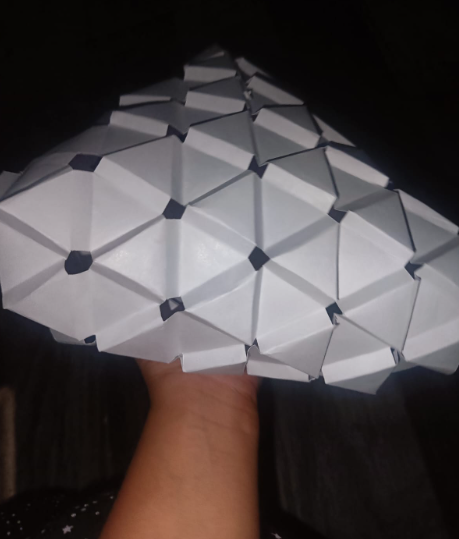
Auxetic Triangle Tessellation in Kirigami
Auxetic materials are fascinating because they expand perpendicularly when stretched, contrary to most materials that thin out. This unique property is utilized in various applications, including advanced kirigami designs.
Characteristics of Auxetic Triangle Tessellation
- Geometric Pattern : The auxetic triangle tessellation consists of repeating triangular units. When these units are cut and folded in a specific manner, they exhibit auxetic behavior.
- Material Properties : This type of tessellation can change its surface area and volume significantly when stretched or compressed.
- Applications : Auxetic structures are used in developing flexible electronics, medical devices, and adaptable architectural materials.
Steps to Create Auxetic Triangle Tessellation in Kirigami
Design the Pattern : Start by designing a triangular grid on paper.
Cutting : Make precise cuts along the edges of the triangles. The cuts should be designed to allow the triangles to move relative to each other.
Folding : Fold the paper along the edges of the triangles to create a three-dimensional structure.
Applications of Auxetic Kirigami
- Flexible Electronics : Creating circuits and devices that can stretch without breaking.
- Medical Devices : Designing stents, bandages, and other devices that need to expand and contract without losing structural integrity.
- Architectural Design : Developing adaptive structures that can change shape and size in response to environmental conditions.